The computer system, while relatively simple in concept, is not entirely trivial to set up in the cars. This page aims to give some of the details of setting them up generally in the vehicles.
General Setup
There are two components you need to install at the base level to run the computer in the car: the computer box, and the touchscreen display.
Computer Box
You have to be sure you plug in all of the connections mentioned here, or you may be missing functionality or otherwise be handicapped.
Physical Mount Location
Each car has a different location that the computer is mounted. Here are the locations in the active cars.
- Karcharias: Velcro mount above the driver’s right shoulder
- Sting: Aluminum mount to the right side of the battery box, in the engine compartment
Installation Steps
1. Sensors
The easiest thing to do first is to connect all of the sensors to the Arduino breakout board. Some of the sensor connections, primarily the button inputs, are already plugged in through a connector mounted in the side of the box. Others, such as the speed sensor, need to be plugged in manually. You only need to worry about plugging in connections that the car you are working with has installed.
The sensor connections on the breakout board are connected as follows, starting from the bottom and going up:
- Left Side: Voltage, Temp, Temp, Airspeed
- Right Side: Wheelspeed, Channel0, Channel1, Channel3+4
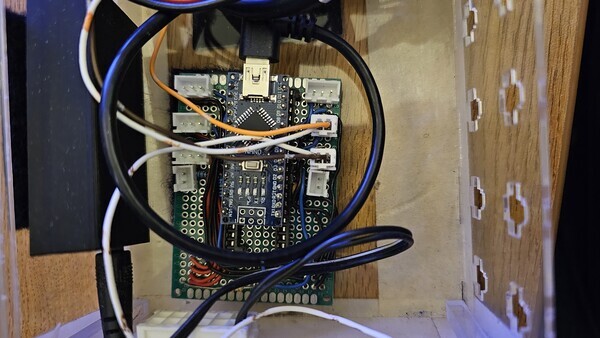
Additionally, if the car has it equipped, the 4-pin connector on the side of the box needs to be connected. Currently, that 4-pin is only available in Karcharias.
2. Display
The display has two cables to be connected, the HDMI and the USB-A connections. The HDMI will go directly into the adapter/extension that is in the computer box. The USB-A cable needs to be plugged into one of the available USB ports on the Raspberry Pi.
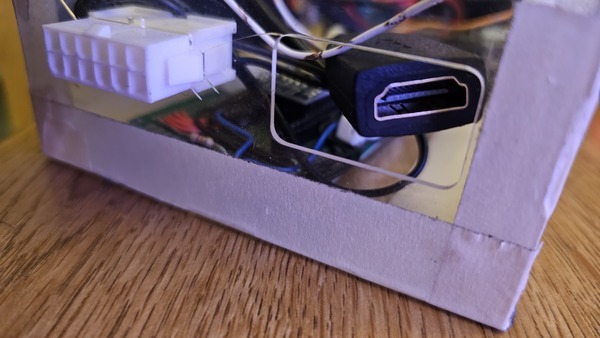
3. Power
Finally, the 12-pin connector on the side of the box (see above image) needs to be connected. This currently has the power routed through it. The reason we went with a larger connector is because in the future, we want to be able to run sensor wires and such through the connector as well to make setting up the box easier.
Touchscreen Display
We have a hobbyist 7-inch touchscreen display that we use to show the driver display to the driver. This needs to be installed in the mount in the car, which may be in different locations depending on the vehicle. In Karcharias, it is in the top of the cabin. In Sting, it is right above the steering wheel.
Mount Security
Not all mounts are created equal, and some of them do not do a great job of holding the display while the car is in motion. If this seems to be the case, use some rubber bands to ensure that the display does not fall on the driver and distract them.
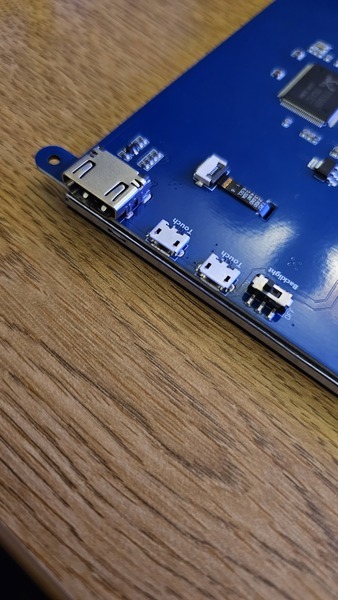
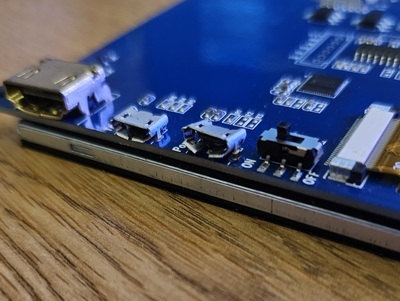
Regardless of the location, there will be two connections that need to be hooked up, a micro USB and an HDMI. Now, due to poor cable choice, the USB cable will end up bending more than you would probably like as the connection is quite tight. That is alright, just monitor the USB port for damage. When hooking it up, make sure that the USB port you use is labelled as supporting touch.
Gotchas and Other Things to Look Out For
There are some quirks of this system that you have to watch out for, and some components that need to be monitored for breakage. We carry spare parts for a lot of these things, but you need to know to replace them.
Power Delivery Board
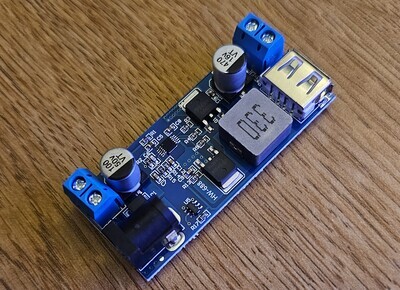
We have a buck converter that takes the 12v power from the car and converts it to 5v for our Raspberry Pi. It is simple, and works great, but it is not made of the most robust construction. Specifically, a lot of the components on the PCB are surface-mounted, meaning that they can be knocked off with little force. We have had capacitors knocked off of 2 boards in the span of 2 years. So be careful. We do own multiple spares.
Display USB Port
Due to the unfortunate cable choices mentioned previously, the USB ports on the displays tend to be under a decent amount of force when installed in the cars. This is fine under normal usage, but if the cables get jarred, it is easy for the port to get messed up. If it does, you could try to get electrical team to fix it, but there are no promises. That display might just be useless beyond testing now.
Speed Sensor Placement
We have problems with this more often than not, so be sure to be checking this quite often. The wheelspeed sensor is a hall-effect sensor attached to the rear wheel of both vehicles. It works by counting the time that elapses between magnet passes, and then calculating speed from that. Usually, if it is not working, one of two things happened: the sensor was moved, or the magnet was moved. Ensure that the magnet passes sufficiently close to the sensor.